Overview
In this example we will see how to configure the Raspberry Pi to serve a web app which allows the Raspberry Pi to share its screen and speakers (“what you hear”) to the PC browser. Additionally, thanks to a virtual keyboard running on the Raspberry Pi, it will be possible to emulate the keypresses captured and sent from within the web page in the browser.
Okay, now you are asking yourself what are the differences from VNC+SSH or other similar sauces? Many differences (see the below list of features): this one tries to be a step forward in the modern era where everybody expects to do everything in the browser with no pain and is intended to work in a LAN as well as over the internet.
As a bonus we will give very easy instructions about how to push the screen to a Janus videoroom in the cloud so that one or more participants in the room can see and even control your Raspberry Pi through their browsers.
A link to the source code and hints about how to improve or customize this web app are provided later in this page.
To summarize, this is the list of features that we want from this solution:
- clientless, meaning that only a browser is necessary on the client side and that no browser plugins are required;
- no dependencies on third-party software components on the Raspberry Pi side: UV4L does all the magic (e.g. HTTP/HTTPS web server);
- use of secure and standard web technologies only, like WebRTC, which brings some benefits in terms of streaming experience (little delay, dynamic bitrate adaptation to available bandwidth, NAT traversal, mandatory encryption, etc…);
- work on LAN as well as on internet;
- optionally “share the display” (everything on it, not just X screens): in facts, the frame buffer is captured and there is no need to install an X Server;
- optionally share the what you hear audio: for example, if you a play music file on the Raspberry Pi, you will hear the sound coming out from the PC speakers;
- optionally headless Raspberry Pi: it does not matter if you have or not real display and speakers connected to it;
- optional keyboard emulation: what you type in the page is actuated on the Raspberry Pi;
- efficient, e.g. by using H264 hardware encoding and other optimized pipelines;
- no latency;
- can be password-protected;
- for developers: the client web app is implemented with the React JS Library, so it can be easily debugged or further customized (e.g. with nodejs).
Although specific to the Raspberry Pi, because we are assuming the Video4Linux2 raspidisp driver is used to efficiently capture the screen, this example works with little or no modification on x86 if we load the xscreen driver instead of raspidisp.
Installation and configuration
The following installation steps have been tested on a fresh new installation of Raspbian Stretch on a Raspberry Pi 3. Beware the poor Raspberry Pi Zero CPU can hardly cope with audio and video at the same time, you will have to choose between the two in this case.
- Install all the required UV4L packages according to these installation instructions (do not consider the generic section about the audio settings as we will discuss this in a moment) : uv4l, uv4l-raspidisp, uv4l-raspidisp-extras, uv4l-server, uv4l-webrtc, uv4l-demos. The uv4l-demos package contains the web app which has been already built from the sources.
- Let’s see how to configure the audio part first. This is optional. Login into the Raspberry Pi and edit the file /etc/modules and insert this line:
snd-aloop
Create a file /etc/modprobe.d/alsa-base.conf and insert this line:
options snd-aloop index=1
Reboot the system to make the changes above effective before proceeding:
$ sudo reboot
Login into the Raspberry Pi again and create a file /etc/asound.conf with the following content:
pcm.!default {
 type hw
 card 1
 device 1
}

ctl.!default {
 type hw
 card 1
 device 1
}
Playing the audio through your loopback interface makes it possible to capture it, but there will be no sound in your speakers. In order to play audio on the loopback interface and your actual interface you must make use of the ALSA multi channel with this more sophisticate asound.conf.
Apply the changes to the ALSA subsystem:
$ sudo service alsa-restore restart
- Now edit the default configuration file /etc/uv4l/uv4l-raspidisp.conf, uncomment the following options and leave them as follows (be careful not to specify these options more than once or it won’t work):
framerate = 30
server-option = --enable-builtin-ui=no
server-option = --enable-www-server=yes
server-option = --www-root-path=/usr/share/uv4l/demos/screen-sharing-app/dist/
server-option = --www-index-file=index.html
server-option = --www-port=80
server-option = --www-webrtc-signaling-path=/
server-option = --webrtc-vad=no
server-option = --webrtc-echo-cancellation=no
server-option = --webrtc-recdevice-index=14
server-option = --webrtc-max-playout-delay=0
Note that –webrtc-recdevice-index=14 essentially selects the recording device indicated at row position 14 (starting from 0) in the list given by the command below:
$ arecord -L | grep CARD
sysdefault:CARD=Loopback
front:CARD=Loopback,DEV=0
surround21:CARD=Loopback,DEV=0
surround40:CARD=Loopback,DEV=0
surround41:CARD=Loopback,DEV=0
surround50:CARD=Loopback,DEV=0
surround51:CARD=Loopback,DEV=0
surround71:CARD=Loopback,DEV=0
dmix:CARD=Loopback,DEV=0
dmix:CARD=Loopback,DEV=1
dsnoop:CARD=Loopback,DEV=0
dsnoop:CARD=Loopback,DEV=1
hw:CARD=Loopback,DEV=0
hw:CARD=Loopback,DEV=1
plughw:CARD=Loopback,DEV=0
plughw:CARD=Loopback,DEV=1
If you do not want to share any video, specify the following as well:
server-option = --enable-webrtc-video=no
- Reboot the system:
$ sudo reboot
Let’s Try it!
Open the browser and load the page at http://<rpi_address>, where <rpi_address> has, of course, to be replaced with the real hostname or IP address of the Raspberry Pi in your network. If everything went well, you should now see a page like the following:
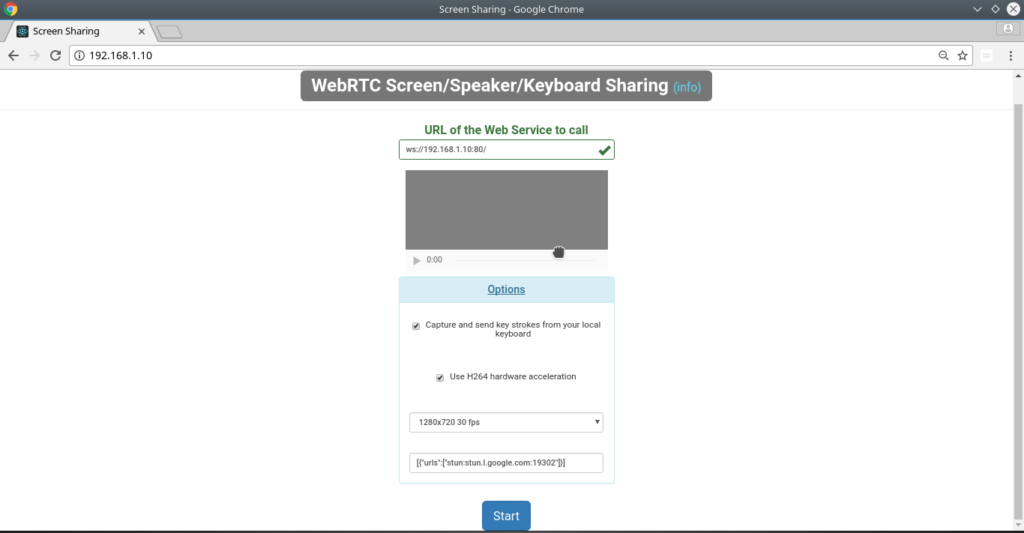
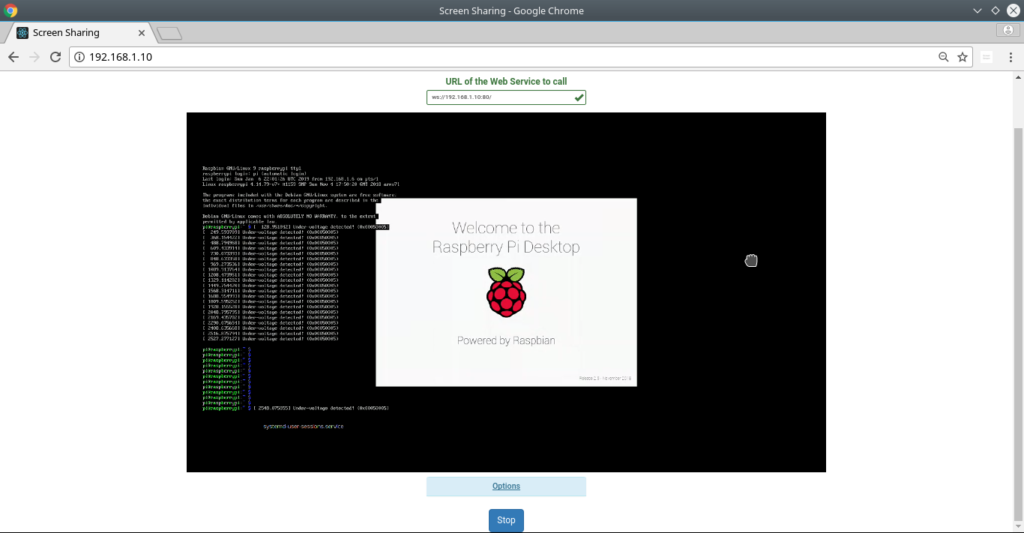
Click on the Start button at the bottom. You should immediately see the Raspberry Pi display output appearing inside the video element in the page (which you can eventually make full screen at any time):
During the sharing session your keystrokes are captured by the web app and sent to the Raspberry Pi, via WebRTC datachannels, where they are received and emulated through a simple service called raspidisp_server which acts as a virtual keyboard (more on this later). You can stop and start to capture the keypresses at any time through the proper checkbox in the Options panel. For a better experience, you should configure the keyboard layout in the Raspberry Pi with raspi-config to be the same as the layout of your local keyboard. If you want to turn off the keyboard emulator entirely, disable the service as follows:
$ sudo systemctl disable raspidisp_server
With regard to audio, if you try to play some music, for example, you should hear the sound coming out from the PC speakers.
Enable HTTPS & password protection
Note that with WebRTC encryption of video, audio and data media streams is mandatory, even if the web server is using HTTP. However, to enable HTTPS in the UV4L web server, you need a password-less private key and a valid certificate. If you do not have them already, a way to generate them is mentioned here. Edit the default configuration file /etc/uv4l/uv4l-raspidisp.conf, uncomment the following options and leave them as follows (make sure to replace /path/to/mykey.key and /path/to/mycertificate.crt with the real paths to the key and certificate files in the filesystem):
server-option = --www-use-ssl=yes
server-option = --www-ssl-private-key-file=/path/to/mykey.key
server-option = --www-ssl-certificate-file=/path/to/mycertificate.crt
server-option = --www-port=443
To enable the standard Basic Authentication, it’s enough to set the password for the predefined “www” user with this option in the same configuration file:
server-option = --www-password=mypassword
Now you can reboot or restart the uv4l_raspidisp service to make the changes effective. At this point the web app is available under the https://<rpi_address>. On the first access, the browser will ask for the credentials: type “www” as user and previously chosen password (“mypassword” in this example).
Web app source code
Check out the project on github.
Broadcast to a Janus videoroom in the cloud
We won’t give all details about every possible options here because they are covered in other examples. However, first of all enable the UV4L built-in services in /etc/uv4l/uv4l-raspidisp.conf:
server-option = --enable-builtin-ui=yes
then restart the uv4l_raspidisp service:
sudo service uv4l_raspidisp restart
Now with the browser open the page at http://<rpi_address>:9080/janus. A page like the following should appear:
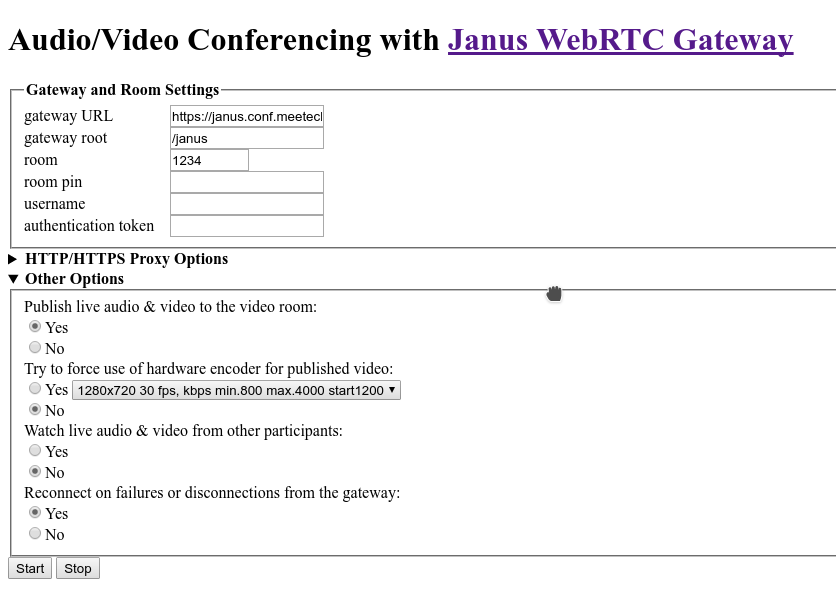
Click the Start or Stop buttons to start or stop the screen video & audio broadcasting to the default videoroom on a Janus instance on the internet (which is mainly used for testing purposes by their maintainers):
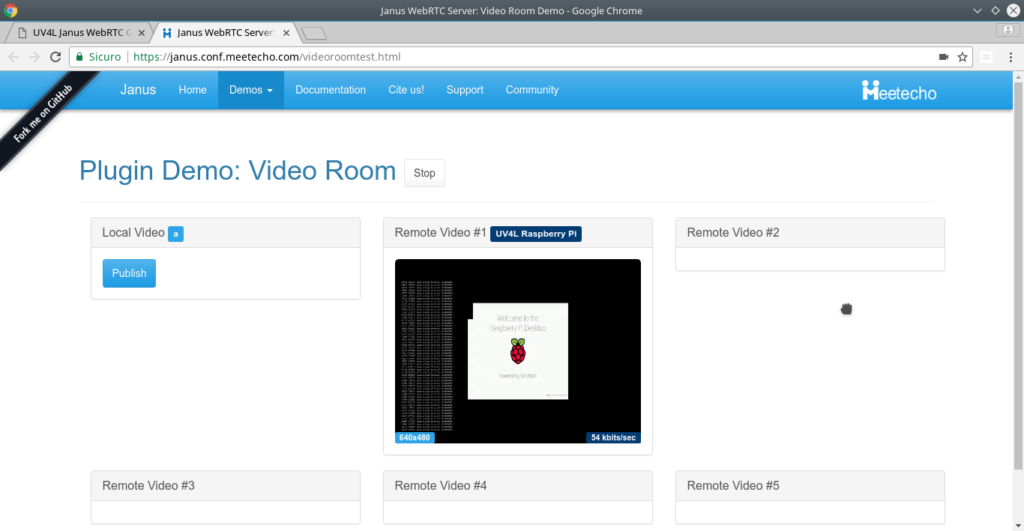
Note that if data channels are enabled, anybody in the room can take control of the Raspberry Pi if the keyboard emulator is running on the Raspberry Pi. To disable the keyboard emulator service please refer to the configuration paragraph above. If you want to start or stop via command line, please refer to this more detailed example.
Playing RetroPie games in the browser!
In this particular case, if you want to play RetroPie games make sure to detach the physical display from the Raspberry Pi before starting RetroPie, if you have one connected to it. Please also make sure that an .asoundrc is not present in your home directory as this file would override the /etc/asound.conf configuration defined before, which is essential to get the sound in the browser (assuming you want the game sounds too). Below is a demo playing Super Mario World. In this demo (see this tutorial), to reduce the network latency as much as possible, a Raspberry Pi 3 has been connected to the router through an ethernet cable, while the PC was on WiFi in the same LAN. framerate=60 has also been previously set in /etc/uv4l/uv4l-raspidisp.conf to make the game more fluid. It should work well over internet too (e.g. if you first expose your Raspberry Pi to the internet). A different approach would be to try to play RetroPie on the cloud in a Janus videoroom with 2 players, but this would probably deserve a whole new tutorial…
Possible improvements
The web app can be extended to support the following use cases. Contributions are highly appreciated.
- Add audio & video recording and playback from within the browser
- Add capture of mouse events
- Better UI, especially on mobiles
- Try this with PI TV HAT to watch TV, change channels…
- …?